
Azure Functions tip: working locally with F# Scripts
01 Jun 2017I have been working with Azure Functions quite a bit lately. As a result, with more and more functions to develop and maintain, figuring out what a sane workflow might look like has gained some urgency. This post is not particularly deep, and is intended mainly as notes on things I have been trying out to get a decent local development experience with Azure Functions using F# scripts.
First, what is the problem?
While the development experience of Azure Functions in the Azure portal is decent, given the constraints, this is clearly not acceptable for anything beyond work “in the small”. What works for a small script quickly becomes painful for larger function apps: the editor is slow, offers limited support (no Intellisense…), and the workflow ends up being essentially “try out code and hope it works”, with no source control.
What we really want is, not that: we want a decent editor, and the ability to run code locally before committing it to source control and shipping it.
The first two step towards that direction is to use one of the supported continuous deployment options, and the Azure Functions command line tools (CLI).
The continuous deployment part is straightforward, with numerous options available: once the setup is complete, any time code changes are pushed to GitHub (for instance), they are automatically deployed to the Function App. Once that is done, we have code that we can edit locally. Progress.
However, we cannot run that code locally - yet. This is where the CLI tools come in. While slightly out of date, the following post provides a good walkthrough. With the CLI, you can create a scaffold locally for the various out-of-the-box trigger templates, matching what you would get in the portal, and you can run them locally, against a local server running on your machine.
Side note: the CLI tools are now azure-functions-core-tools on npm.
Side note: I am using Azure Functions Core Tools (1.0.0-beta.97). As hinted in the name, this is beta, with the corresponding expectation that things may change.
At that point, you can edit the code in whatever editor you fancy, save it, run it locally, and push to GitHub when you are satisfied. More progress.
So what is wrong, then?
The problem at that point is that, if you open your script in your editor, it is entirely broken. Let’s illustrate on a trivial case, and create an F# http trigger function from the command line:
mkdir demofunction
cd demofunction
func init
func new
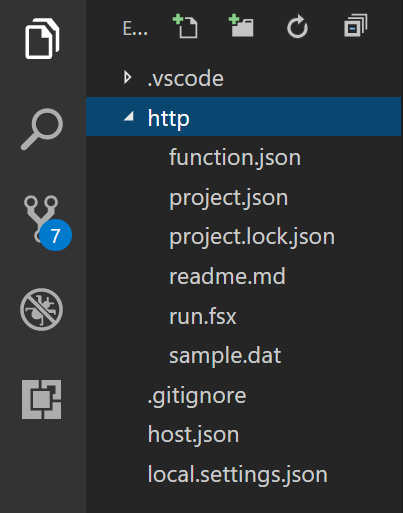
Pick F#, HttpTrigger, and name that function http. At that point, the scaffold has been created for you:
… and you can run that function locally:
func run http -c "{\"name\": \"foo\"}"
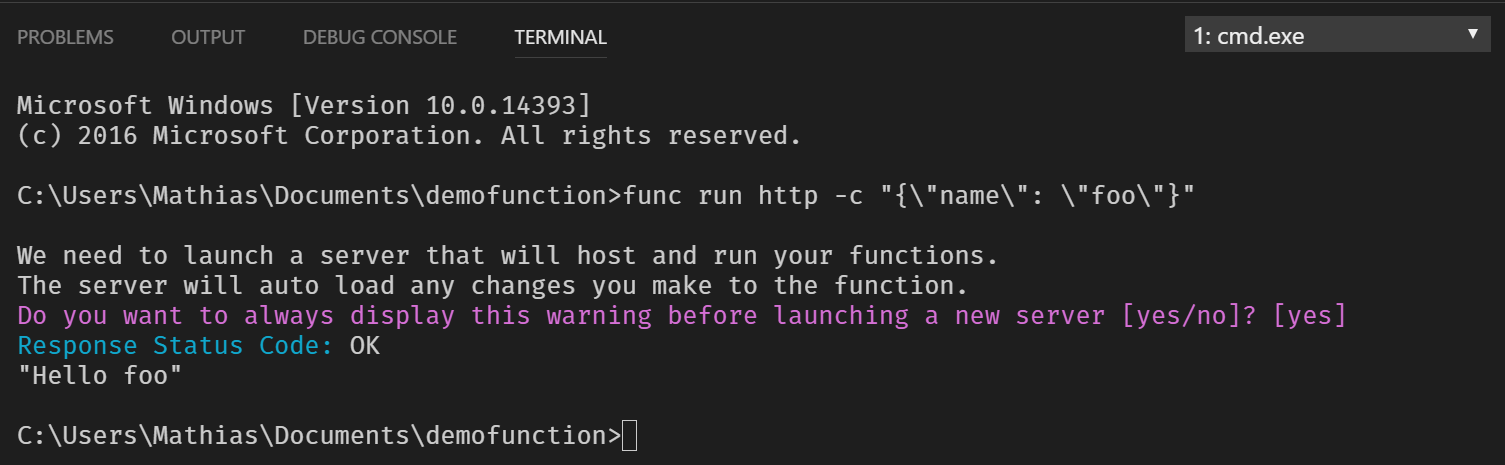
Side note: make sure that NuGet.exe is in your PATH, otherwise it seems the function might have trouble restoring packages it depends upon.
In other words, everything works. But if you open the file run.fsx, the F# script that contains the code we are running, a sad sight awaits you:
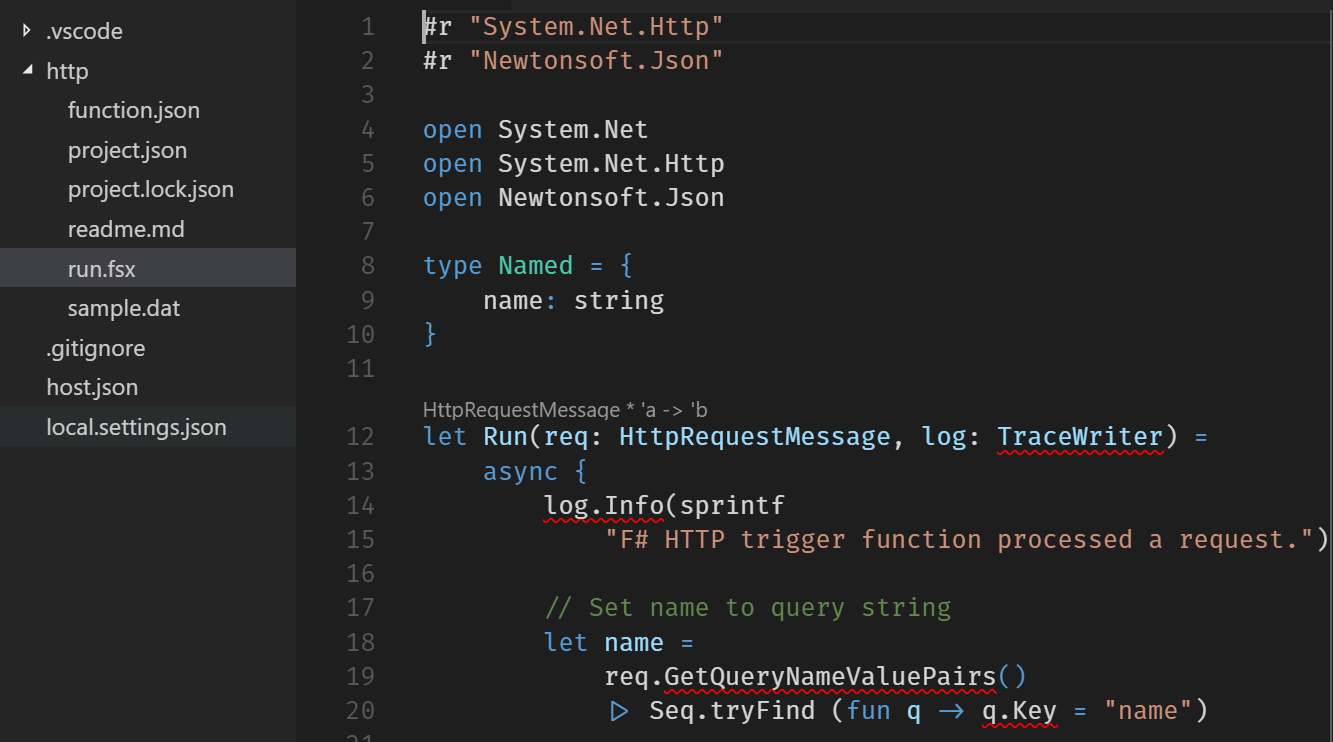
Our script is broken. Based on our imports, the TraceWriter type is unrecognized, and so is req.GetQueryNameValuePairs(). This is displeasing, aesthetically and practically. We are left with no IntelliSense again, and we cannot run that script in the F# interactive.
Side note: I am aware that Visual Studio tooling has been improving fast. Nothing against Visual Studio, but I’d like to make sure I can run my code without relying on it, so my goal here will be to run everything from Code.
The issue here is that Azure Functions magically loads a bunch of assemblies behind the scenes when running a function. The upside is obvious: we don’t need to deal with those pesky plumbing details when writing a function, and can focus on what we want the function to do instead. The downside is that without more information about how the magic works, the script isn’t self-contained.
Can we fix that? Clearly, the CLI has no problem running the code, so these magic dependencies must be somewhere on our machine.
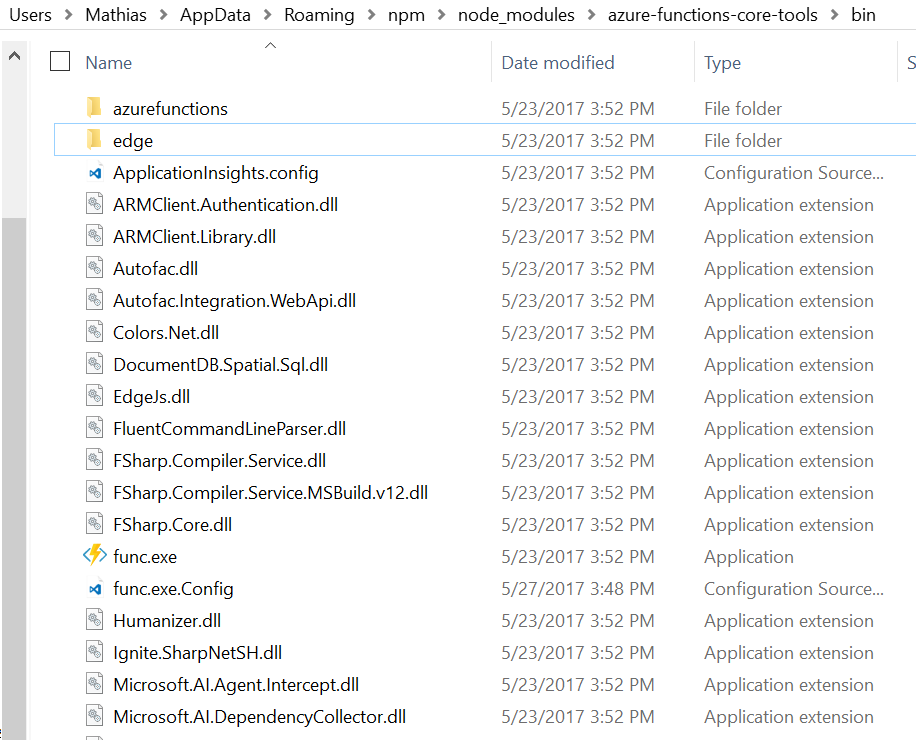
After a bit of speleology, I found where all of this was hidden. In your user profile (in my case, C:/Users/Mathias/AppData/Roaming/), you should find the following folder:
...Roaming/npm/node_modules/azure-functions-core-tools/bin/
… which contains all the “magic” dependencies:
Given that information, we can easily straighten up our run.fsx script:
#if INTERACTIVE

open System

#I @"C:/Users/Mathias/AppData/Roaming/npm/node_modules/azure-functions-core-tools/bin/"

#r "Microsoft.Azure.Webjobs.Host.dll"
open Microsoft.Azure.WebJobs.Host

#r "System.Net.Http.dll"
#r "System.Net.Http.Formatting.dll"
#r "System.Web.Http.dll"
#r "Newtonsoft.Json.dll"

#else

#r "System.Net.Http"
#r "Newtonsoft.Json"

#endif

// rest of the original script unchanged afterwards
open System.Net
open System.Net.Http
open Newtonsoft.Json
This isn’t particularly elegant or clever, but it does the job. The original script hasn’t changed, but we can now take the entire script, and run it through the F# interactive.
Side note: the reason I ended up with this slightly complicated setup, using 2 branches
#interactiveand#else, was to address some version compatibility between the dlls that were loaded.
As an example, we can, for instance, bypass the CLI, and test out our Run function entirely locally.
We create a fake TraceWriter first:
type Log (level) =
    inherit TraceWriter(level:System.Diagnostics.TraceLevel)
    new () = Log(Diagnostics.TraceLevel.Verbose)
    override this.Trace(event) = printfn "%A" event
… which allows us to create a request, send it to the Run function, and check whether it does what we expect:
let req = new HttpRequestMessage(HttpMethod.Post,Uri("http://www.example.com"))
req.Content <- new StringContent("{\"name\":\"FSI\"}")
req.SetConfiguration(new Web.Http.HttpConfiguration())

let log = Log()

Run(req,log)
|> fun resp -> resp.Content.ReadAsStringAsync()
|> Async.AwaitTask
|> Async.RunSynchronously
… which produces the following:
06/01/2017 11:44:50 Info F# HTTP trigger function processed a request.
val it : string = ""Hello FSI""
How about NuGet packages, then?
In the same vein as when you work from the portal, you can add NuGet dependencies by editing the project.json file, like this:
{
  "frameworks": {
    "net46":{
      "dependencies": {
        "FSharp.Interop.Dynamic": "3.0.0",
        "FSharp.Data": "2.3.3"
      }
    }
  }
}
Running the function through the CLI will trigger a NuGet package restore. The same trick can then be used to reference the packages, with one difference. Instead of going alongside the default dependencies, they are downloaded into (in my case) C:\Users\Mathias\.nuget\packages. You can find out that location by checking the end of the project.json.lock file, which should contain something like:
  "packageFolders": {
    "C:\\Users\\Mathias\\.nuget\\packages": {}
  }
}
That’s where I will stop on the topic for today. Two quick things before closing:
First, I recommend taking a look at this blog post by Krzysztof Cieslak, where he explores a different direction to address similar questions, essentially bypassing the project.json mechanism, and relying on Paket instead to manage dependencies. I tried to stay as close as possible of the original approach followed by the Azure Functions team, but his take opens up interesting possibilities.
Then, even though I am a big fan of scripts in general, I tend to use them primarily in the small. At some point, once your code base grows, you are better off having a “real” project. In that frame, I am currently exploring pre-compiled F# functions as an alternative to scripts - more on this soon, probably :)
Hope you found something useful or interesting in this post! And, if you have comments or ideas on this topic, I’d love to hear about it. In the meanwhile… happy coding!